
We understand that sometimes our clients require their Recruit CRM data in Excel format rather than CSV. In this article, we will guide you through the straightforward steps to seamlessly convert CSV files into Excel, ensuring a smooth transition for enhanced data management and analysis.
Converting CSV and XLS files online 🧞♂️
Converting CSV to XLS manually 🧑💻
Convert CSV to XLS files in Windows 👇
Option 1: CSV to Excel using the “From Text/ Data” Option
Option 1: CSV to Excel using the “From Text/ Data” Option
1. Open Microsoft Excel, and start a Blank workbook.
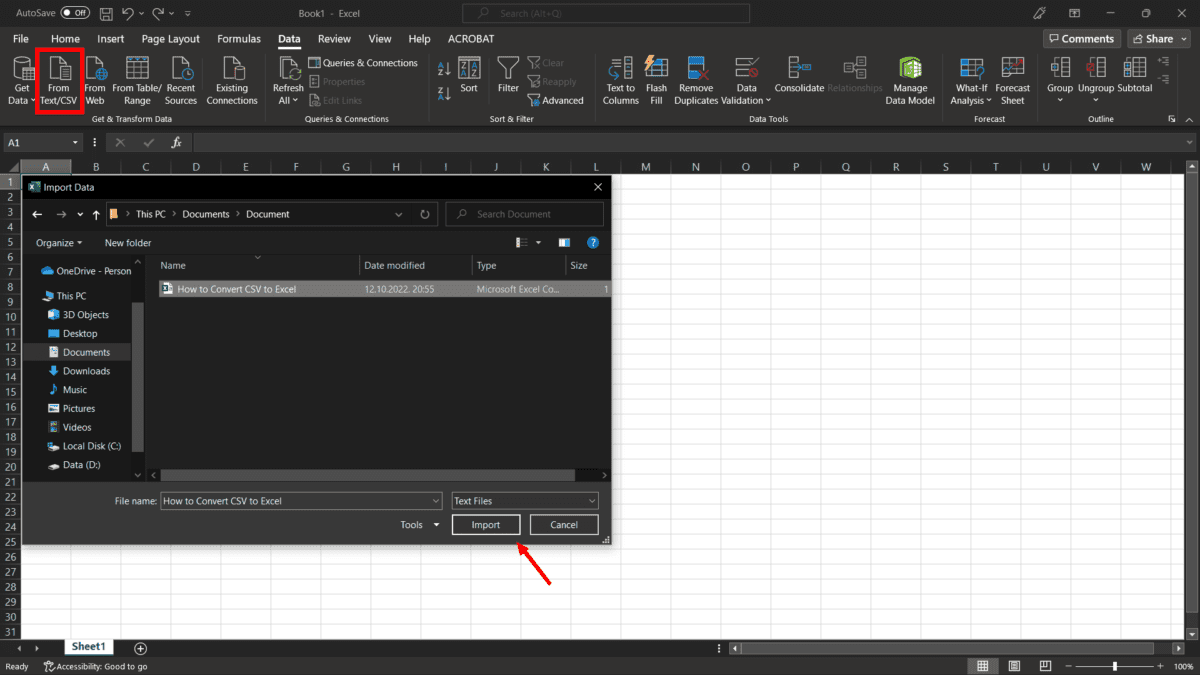
2. Once the new spreadsheet is open, select Data from the ribbon, and then click on the From Text/ CSV button on the upper-left-hand side of the window. An Import Data pop-up box will appear. From there, select the CSV file you want to import and click on Import:
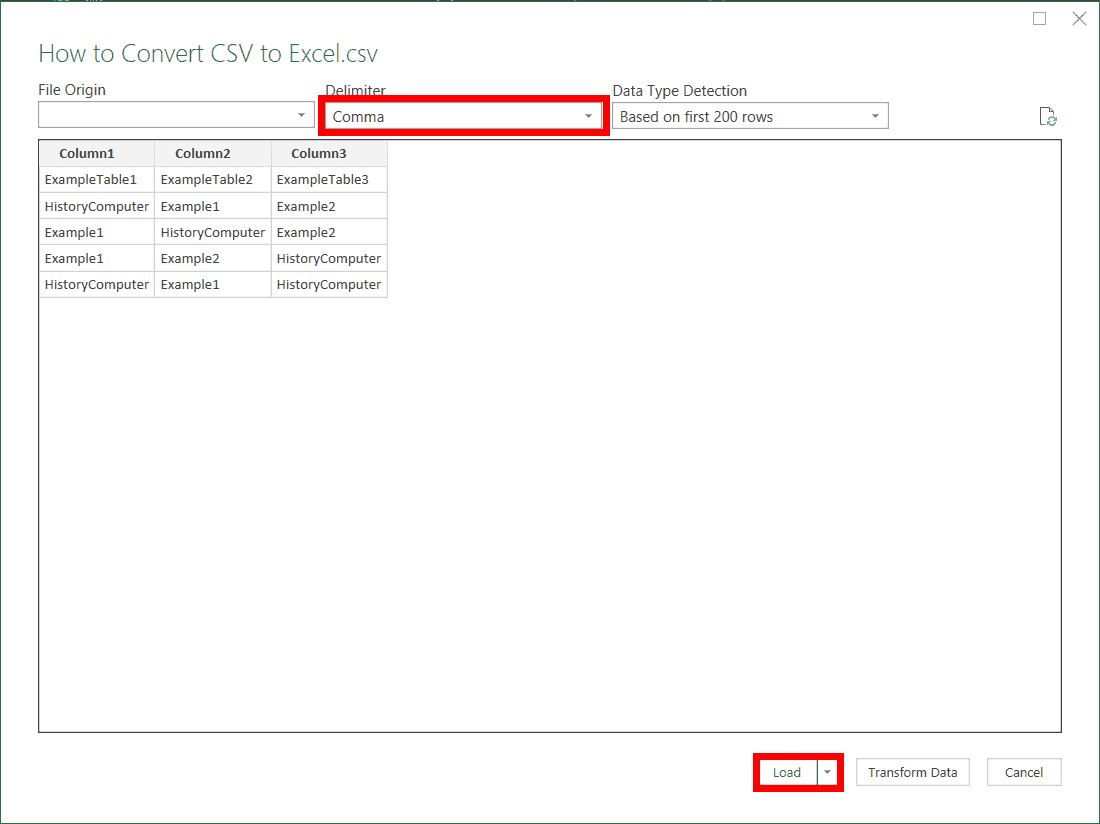
3. A new tab will appear, asking you to define certain parameters within the imported data, like File Origin, Delimiter, and Data Type Detection. Under delimiter select the delimiter used in your CSV file; It is best to choose comma by default. Once everything’s set, click on Load:
4. Once you click on Load, excel will load your data from the CSV file into a formatted table:

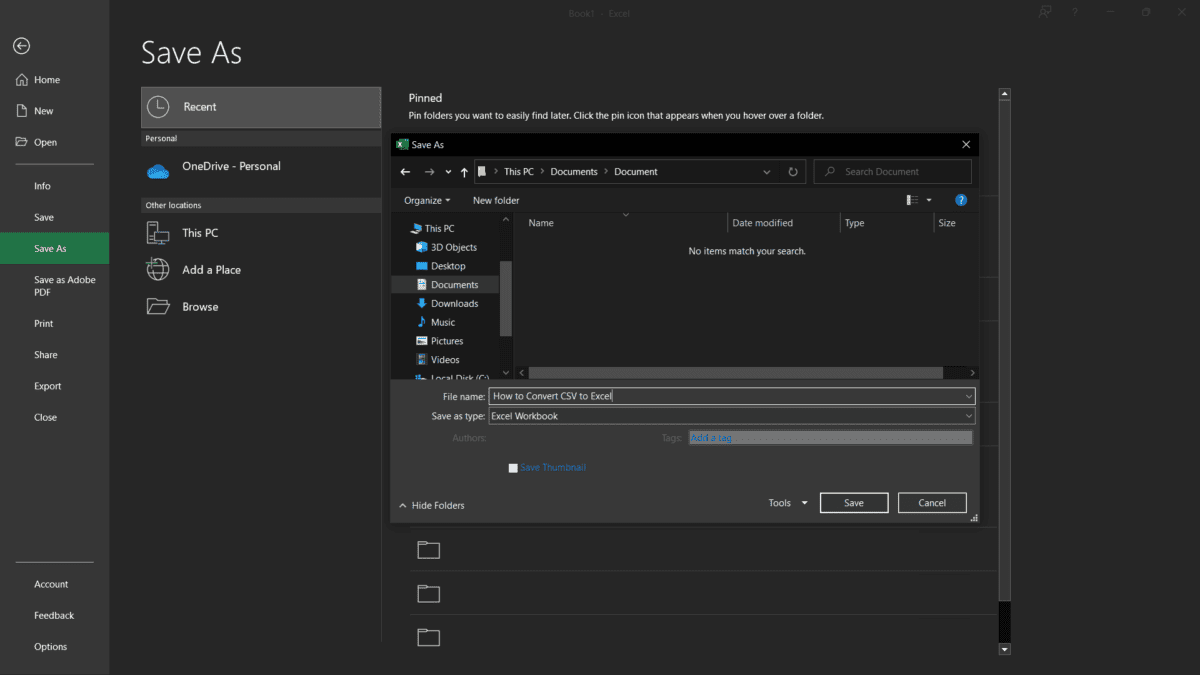
5. After this you can save your file by clicking the File and then Save As and Excel will save your file as an xls or Excel file:
Option 2: CSV to Excel using the “Text to Column” Option
Option 2: CSV to Excel using the “Text to Column” Option
1. Open Microsoft Excel, and start a Blank workbook.
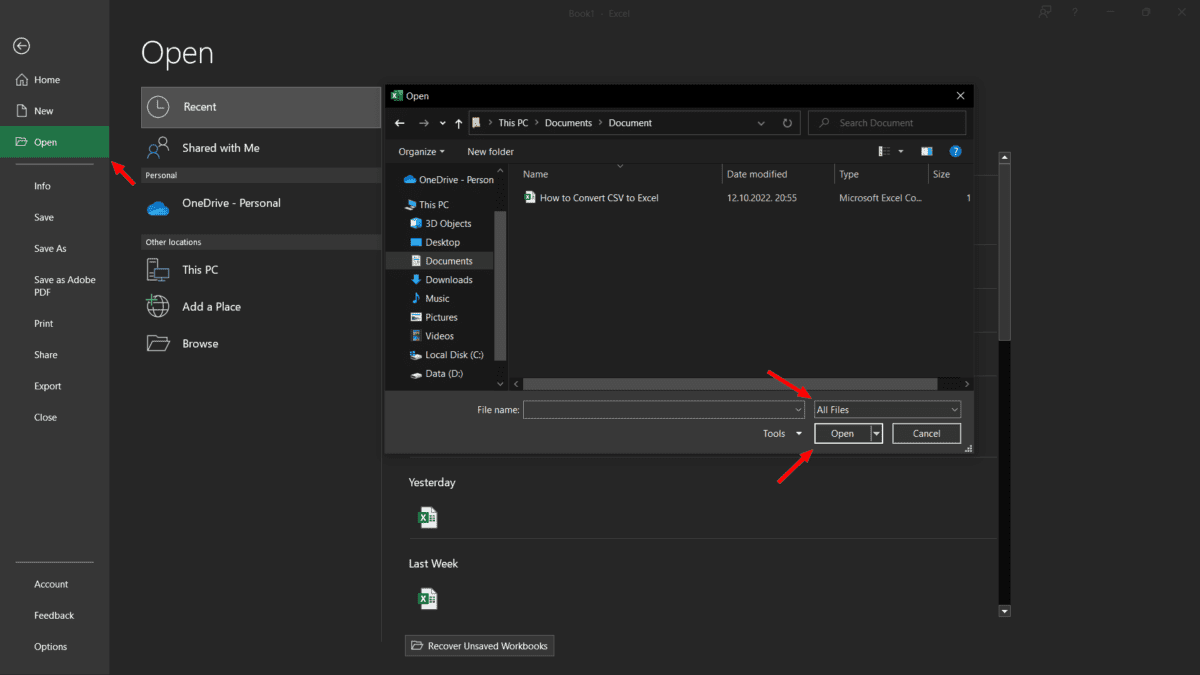
2. Click on File, go to the "Open" tab of the left bar, and choose Browse from the Open side-pane to display all the files from your device. Choose the CSV file you want to convert and click on Open:
Once Excel has opened your CSV file, you’ll notice that your data is separated into the appropriate rows. However, it’s not separated into the appropriate columns. Instead, the data is saved in the first column of each row. Luckily, you can automatically sort the data by using the Text to Column option.
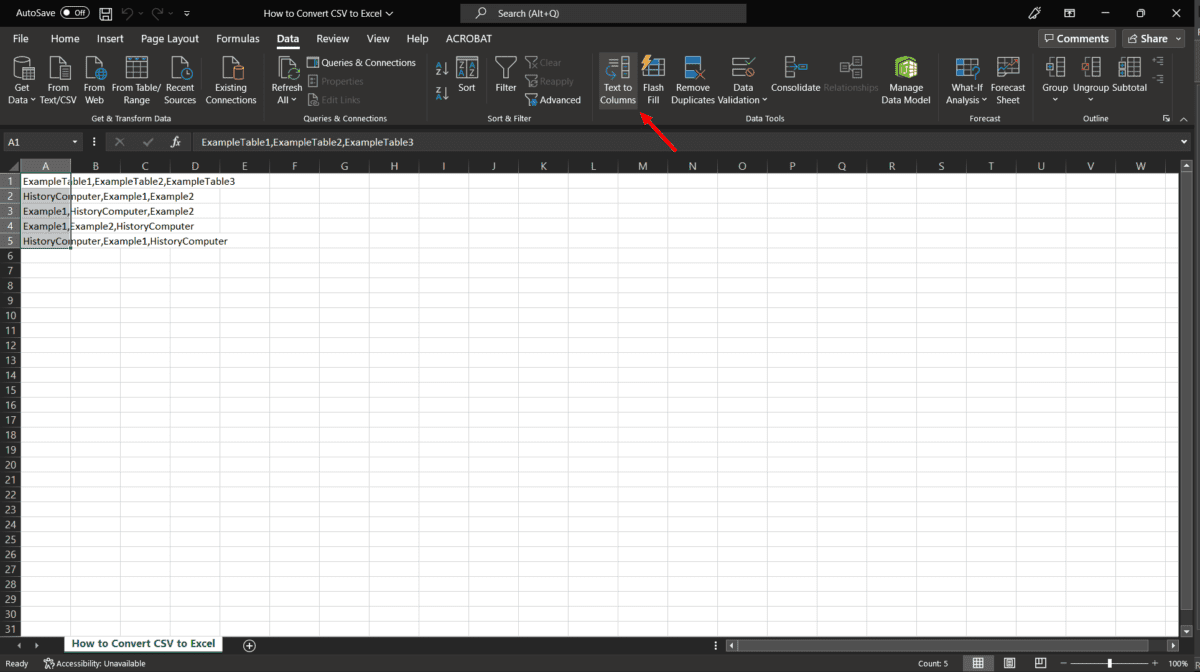
3. Go to the Data tab in the ribbon. Select the rows of data that you want to convert, and click on the Convert to Text option located in the Data Tools field. This will open a Convert Text to Column Wizard that will guide you through the process.
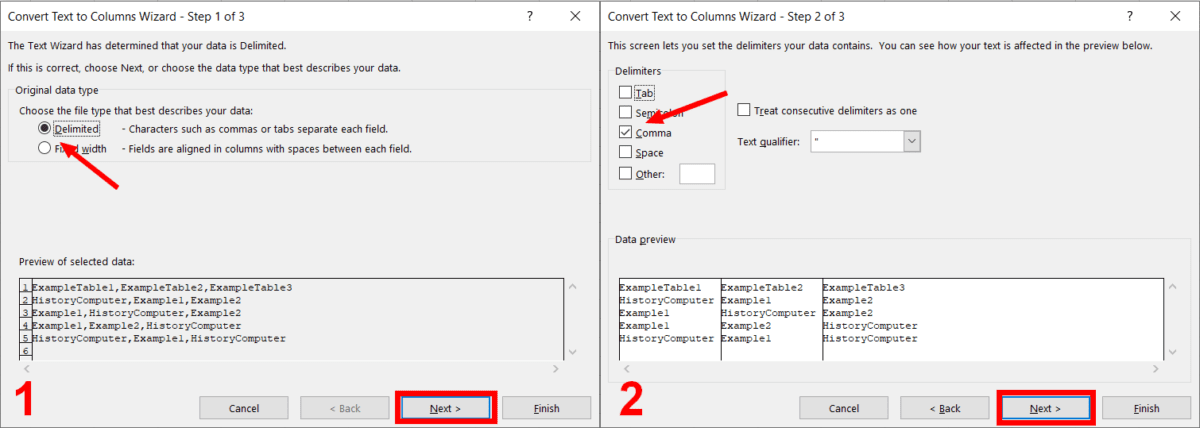
4. Under the Original data type, choose Delimited, and click Next. In the next section, check the box next to the type of delimiter your CSV file uses (our example uses a comma). The Data Preview field will allow you to see the data being assigned to corresponding columns. Click Next, choose the spreadsheet destination, and click Finish. Your data is now separated into the corresponding columns:
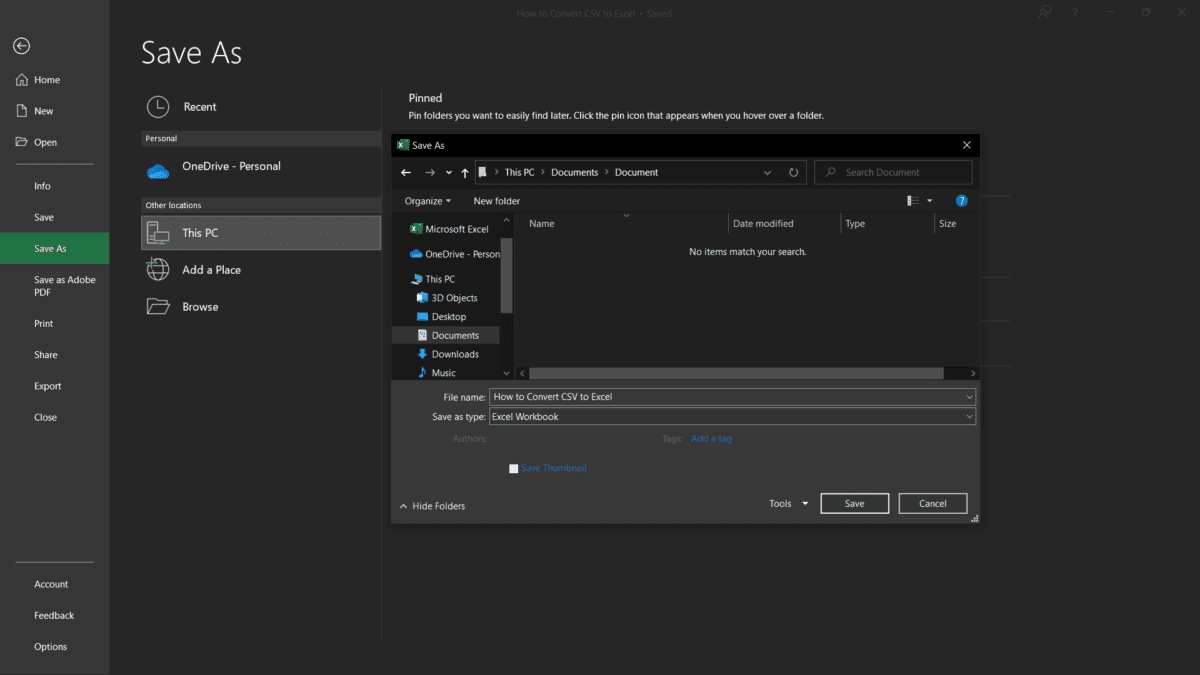
5. Click on the File tab and select the Save option. When the Save dialog box appears, give your file a name, and choose Excel Workbook in the Save as type drop-down menu:
Option 3: CSV to Excel using Google Sheets option
Option 3: CSV to Excel using Google Sheets option
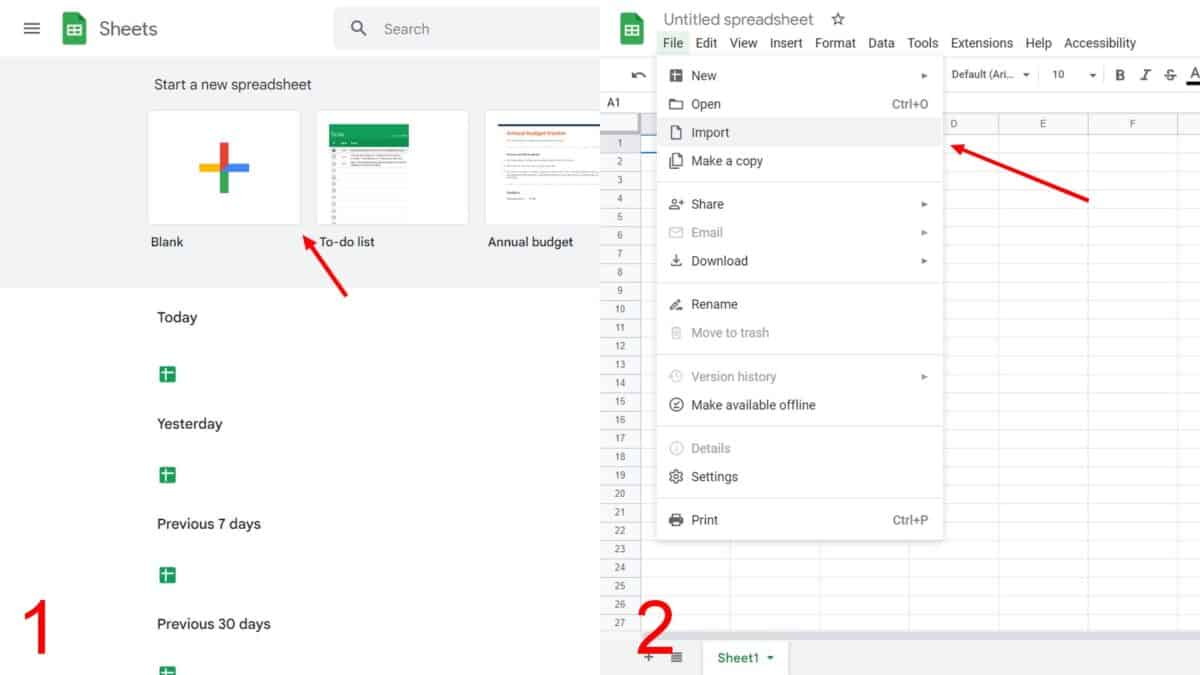
1. Log into Google Sheets using your Google credentials. If you don’t own a Google account, you might have to create one. After you’ve logged in, select the Blank option to create a new spreadsheet. Once the new spreadsheet is open, click on the File menu in the upper right corner of the page, and select Import:
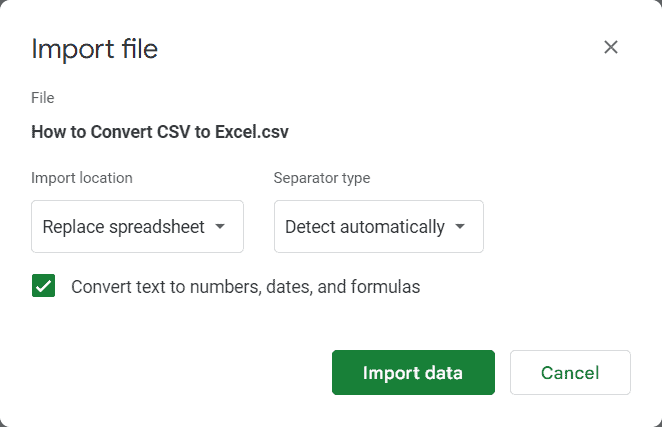
2. This will open up an Import file dialog box. Click on the Upload tab, and either drag and drop your file or click on the Select a file from your device button to locate the file and upload it. Google Sheets will ask you about the import location and separator (delimiter type) it should use to derive data. You can leave the delimiter selection drop-down at Detect Automatically and click on Import data:
3. Google Sheets will automatically separate the data into its appropriate cells. Now you can save the file.
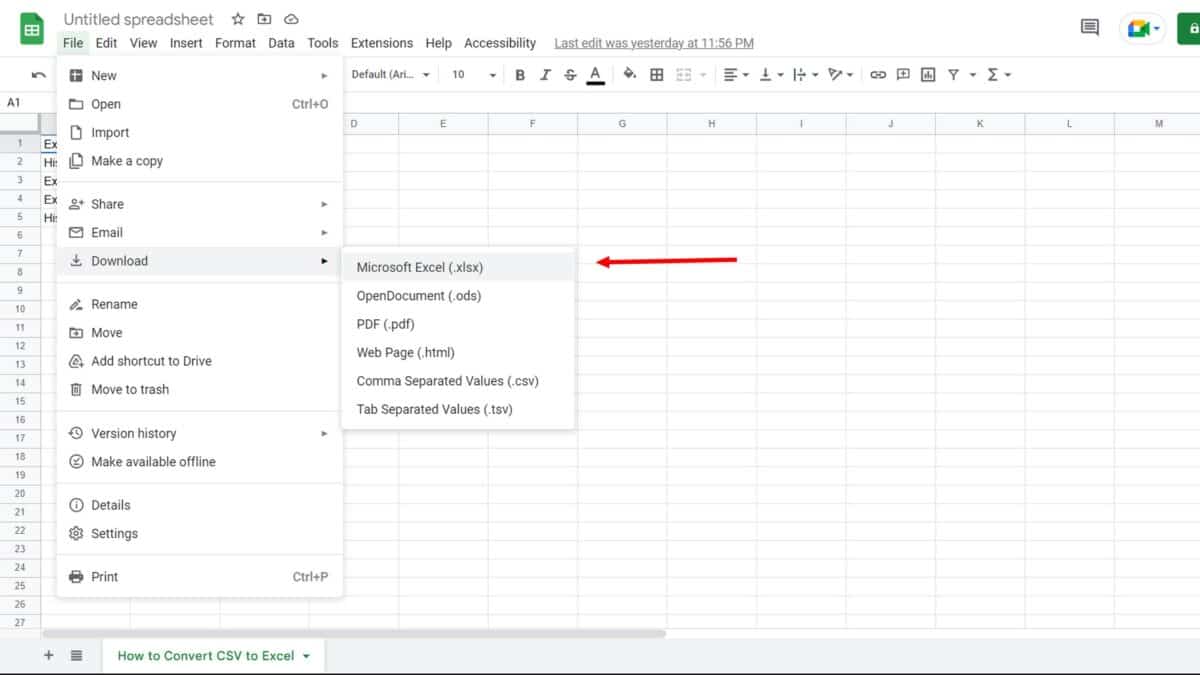
4. Once you’ve made the necessary changes, if any, go to File, and choose Microsoft Excel (.xlsx) from the Download drop-down menu:
Convert CSV to XLS files in Mac OS 👇
Importing CSV files in Excel to convert them into XLS files in Mac is pretty similar to the options we have for Windows.
Here are the steps:
Here are the steps:
1. Once you have downloaded the CSV into your device, you need to open a blank Excel spreadsheet. Select File > Import:

2. Choose CSV file and select Import:

3. Make the following selections:
Select Get Data.
Choose Delimited.
Select Next.
Delimiters: Comma (no other options should be checked).
Select Next.
In the Data Preview window, select all columns.
Column data format: Text
If you select all of the columns, you'll see a label above each column in the preview that says Text:

4. Click on Finish.
5. Excel will ask you where you want to put the data. choose Existing sheet and select OK.

That's it 😄 You have successfully converted your CSV file into an Excel sheet!